Tag Archives: Office365

Office 365–Enable First release Option

Set up the release option for your organization

You can change how your organization receives Office 365 updates by following these steps.

Important   It can take up to 24 hours for the below changes to take effect in Office 365. If you opt out of First Release after enabling it, your users may lose access to features that haven’t reached the scheduled release yet.

  1. Sign in to Office 365 with your work or school account.

  2. Go to the Office 365 admin center.

  3. Go to Service settings > Updates.

  4. To disable first release, select Standard under the Standard release heading.

    To enable first release choose Entire organization or Select people and follow the steps below.

    Standard and first release programs

    Note    If you don’t see this option in your admin center, your subscription will soon be updated with it and you can change the setting then.

Select people for First Release

Follow these steps to select individual people for First Release. You might, for example, add your IT staff for First Release so they can review features before the rest of your organization. Enable First Release with select people following these steps.

  1. Go to the Office 365 admin center.

  2. Go to Service settings > Updates.

  3. Under first release, choose Select people.

    Note    If you don’t see this option in your admin center, your subscription will soon be updated with it and you can change the setting then.

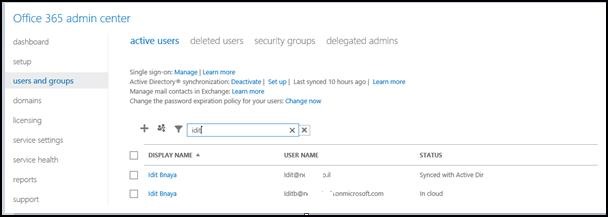
  4. Choose Pick people to add users individually and then use the people picker to select them for first release.

    Office 365 release programs add users

    Or,

  5. Choose Bulk add to add a larger group using a file that contains each person’s email address.

    Bulk add users in Office 365 First Release

    This is similar to how you bulk add users in the admin center.

    Bulk add users to Office 365 release programs

Note   First Release Select People currently only applies to Office 365 top navigation and Exchange Online.


Source: https://support.office.com/en-us/article/Office-365-release-options-3b3adfa4-1777-4ff0-b606-fb8732101f47

Office 365 – Manage licenses – ADD\Remove

1. Assign License Using the office365 portal · From the office365 Portal · Connect to – Office365 Portal with the right permissions (Or global administrator or User management administrator) · In the left section Go to the Users and Groups · Search for the user using the Magnifying glass clip_image002 · Press on the user · In the Licenses page – Check the relevant license

clip_image004

· If you did not provide the user location you will be redirected to the settings page clip_image006 ·Add the User location __________________________________________________________________________________________________ 2. Assign License to individual users Using Microsoft Online Services Module for Windows PowerShell

  • Connect to “Microsoft Online Services Module for Windows PowerShell

*In order to do that you will need to download and install this PowerShell , you can find the download in Here

  Alternatively, you can load the cmdlets manually by typing “import-module MSOnline” at the Windows PowerShell command prompt.

  • Type : Connect-msolservice
  • Enter the credentials of a user with the appropriate permissions (Or global administrator or User management administrator )
  • Get the name of the license Get-MsolAccountSku
clip_image008


  • Now you need to add the location for the user you whish to assign license to  (In my case the location is IL):

Get-MsolUser -UserPrincipalName idit@Domain.com |Set-MsolUser -UsageLocation “IL”

  • The next step will be to assign the license :

Get-MsolUser -UserPrincipalName idit@Domain.com | Set-MsolUserLicense -AddLicenses Domain:ENTERPRISEPACK

clip_image010

___________________________________________________________________________________________________________________________________________ 3. Assign license to multiple users with a powershell script Sometimes you need to assign licenses to multiple users , in this case you can do it with a very simple PowerShell script This script will :

· import the users from a csv file (which you create) ,

· provide the location

· assign the license

So the first thing you need to do is to add the Users UPN  of the users to a Csv file In the header of the table write– display Foe example : image Copy the following Lines to a Text file an save it as .SP1 $licenses = Import-Csv c:\temp\users.csv $licenses | ForEach-Object {get-msoluser  -MaxResults 20 -SearchString $_.display | Set-MsolUser -UsageLocation “IL”} $licenses | ForEach-Object {get-msoluser  -MaxResults 20 -SearchString $_.display | Set-MsolUserLicense –AddLicenses  Domain:ENTERPRISEPACK} (Don’t forget to run the script with the Microsoft Online Services Module for Windows PowerShell) Remove license to multiple users with a powershell script ___________________________________________________________________________________________________________________________________________ Create the csv file for the users you want to delete the license . again , write display in the header of the table on the Microsoft Online Services Module for Windows PowerShell type: 1. $licenses = Import-Csv d:\users1.csv 2. $licenses | ForEach-Object {get-msoluser – MaxResults 1000 -SearchString $_.display | Set-MsolUserLicense –RemovedLicenses Domain:ENTERPRISEPACK}     ________________________________________________________________________________________________________ Add license to all users without license

Import-Module MSOnline Connect-MsolService Get-MsolUser -all | where {-not $_.islicensed} |ForEach-Object{

Set-MsolUser -UserPrincipalName $_.UserPrincipalName -UsageLocation “IL”

Set-MsolUserLicense -UserPrincipalName $_.UserPrincipalName -AddLicenses Domain:ENTERPRISEPACK

}

________________________________________________________________________________________

Remove specific license

Connect-MsolService

$license= “Domain:ENTERPRISEPACK”

get-MsolUser -all | Where-Object {$_.Licenses.AccountSkuID -eq $license}|ForEach-Object{

Set-MsolUserLicense –UserPrincipalName $_.UserPrincipalName –RemoveLicenses “$license”

Write-host $_.UserPrincipalName

}

__________________________________________________

Export list of all users with license:

Get-MSOLUser -All | select userprincipalname,islicensed,{$_.Licenses.AccountSkuId}| Export-CSV D:\userlist3.csv -NoTypeInformation


q         Good Luck  Smile